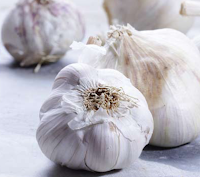
While saving money might not be the driving force behind your home-grown veggie project, you certainly don’t want to lose money, either. As it happens, garlic is one of the most cost-effective plants you can grow. What’s even better is that these little pods are extremely easy to care for, bud beautifully, and are exceptionally versatile in the kitchen.
1)Plant the cloves with the root end pointed down, about 2 inches beneath the soil. If you wish, you can cover the planted cloves with a layer of mulch.
TIP: “Cracking” is when you break the bulbs apart into cloves for planting. It’s best to separate garlic cloves as close to the planting time as possible.
2)During spring growth, garlic needs about an inch of water each week. However, be sure not to overwater your bulbs once they are nearing maturity.
TIP: Mulch is a great way to ensure that your garlic is getting just the right amount of moisture.
3)As soon as leaf growth begins, start to foliar-feed your garlic every two weeks. (This is a technique of feeding plants by applying liquid fertilizer directly to their leaves.)
4)When roughly half of the leaves turn yellow, it’s time to harvest!
TIP: During harvesting, if you pull too hard you may break the stalk from the bulb, which can cause it to rot. Instead, carefully dig up each bulb from below.
5)Tie the garlic together in bundles and hang them to cure for about 5 weeks in a shady, dry area.
TIP: When your garlic is dry, recycled mesh bags are great for storage!
By Sarah G. Mason


Yorumlar
Yorum Gönder